Fixing a punctured tractor tire doesn't have to mean a trip to the mechanic and a hefty bill. With this guide, you can learn to patch your own tires, saving money and reducing downtime. We'll cover everything from identifying the problem to performing the repair, alongside advice on preventative maintenance and when to seek professional help. This guide prioritizes safety and provides a step-by-step approach to help you get back to work efficiently. For further information on tire sizes, check out this helpful guide.
Assessing the Damage: DIY or Professional Repair?
Before you begin, carefully examine the tire. A small puncture in the inner tube is a different story than significant damage to the tire itself. Minor inner tube punctures are often easily repairable at home. However, major damage like sidewall cuts, large punctures in the tire casing, or significant tread wear requires professional assistance. This is crucial for safety and to avoid further damage or costly replacements.
Gathering Your Supplies: Essential Tools and Materials
The right tools are key to a successful repair. For inner tube repairs, you'll need:
- High-Quality Patch Kit: Look for kits specifically designed for tires. Amazon offers many options; read reviews for quality assurance.
- Tire Irons: These tools help remove the tire from the rim to access the inner tube.
- Air Pump or Compressor: Essential for inflating the tire after the repair.
- Soapy Water Solution: Helps pinpoint the leak.
- Sandpaper or File: Roughens the inner tube surface for better patch adhesion.
- Safety Gear: Gloves and safety glasses are absolute necessities to protect yourself from potential injury.
For more advanced tire repairs (those involving the tire itself, not just the inner tube), you may need additional specialized tools like a vulcanizing patch and heat source. These are best left to professionals unless you have experience in tire repair.
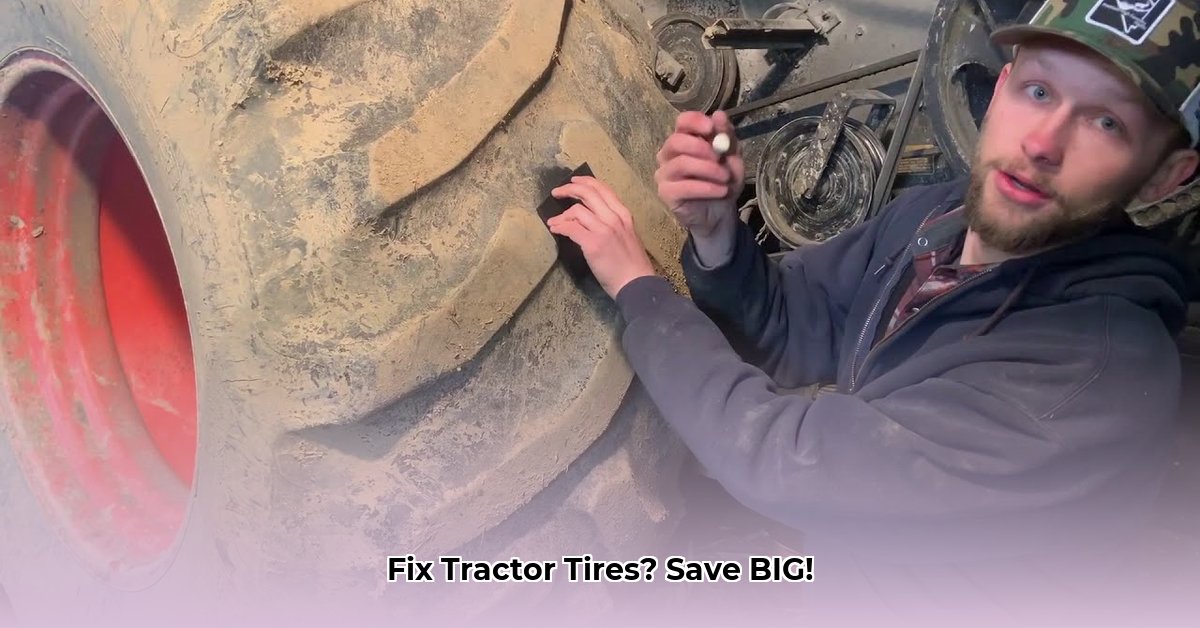
Step-by-Step Inner Tube Repair: A Simple Fix
This section details how to patch a punctured inner tube, a common and relatively easy repair.
Step 1: Locate the Leak: Inflate the inner tube slightly. Apply a soapy water solution; bubbles will appear at the leak's location.
Step 2: Prepare the Puncture Site: Using sandpaper or a file, roughen the area surrounding the puncture. This enhances patch adhesion.
Step 3: Apply the Patch: Follow the patch kit's instructions carefully. Generally, this involves cleaning the area again, applying adhesive to both the patch and the tube, and firmly pressing the patch onto the puncture for the specified duration for optimal adhesion.
Step 4: Inflate and Check for Leaks: Slowly inflate the tube. Submerge it in soapy water again; any remaining bubbles indicate a leak requiring repetition of steps 2 and 3.
Step 5: Reinstall (If Necessary): If you removed the tire from the wheel, carefully reinstall it, ensuring correct seating to prevent future issues.
Beyond Inner Tubes: When Professional Help is Invaluable
Major tire damage, such as significant cuts, sidewall damage, or punctures in the tire casing itself, necessitate professional assistance. Attempting DIY repairs in such cases can be dangerous and may lead to further complications. Professional tire shops possess the specialized equipment and expertise to handle complex repairs effectively and safely, ensuring long-term tire functionality and safety.
DIY vs. Professional Repair: A Cost-Benefit Analysis
The choice between DIY and professional repair depends on the severity of the damage and your skill level.
| Feature | DIY Repair | Professional Repair |
|---|---|---|
| Cost | Significantly Lower | Higher (labor, parts) |
| Time Investment | Moderate | Minimal downtime (but scheduling required) |
| Skill Level | Basic mechanical aptitude | Specialized expertise |
| Suitability | Minor inner tube punctures | Extensive damage, complex repairs |
This data highlights the substantial cost savings of DIY repairs for minor issues. However, the time investment may be longer than a professional repair, which might be more efficient despite the higher cost if time is of the essence.
Preventative Maintenance: Proactive Tire Care
Regular tire maintenance significantly reduces the need for repairs.
- Regular Pressure Checks: Inspect tire pressure weekly, ensuring it aligns with the manufacturer's recommendations.
- Careful Driving: Avoid driving over sharp objects or in rough terrain.
- Tread Depth Monitoring: Monitor tread wear and replace tires as needed. This prevents further damage that may be unrepairable through DIY methods.
These proactive measures contribute to extended tire lifespan and reduce the likelihood of punctures or other damage.
Limitations of DIY Repair: Know Your Limits
DIY patching is primarily suitable for minor inner tube punctures. For radial tires, significant casing damage, or extensive tread wear, professional assistance is crucial. Prioritizing safety is paramount; avoiding unnecessary risk is key for both financial and safety reasons.
Saving Money and Maintaining Sustainability: The Eco-Friendly Approach
Patching tires instead of replacing them is an environmentally responsible practice that minimizes waste and reduces the environmental impact of tire disposal. This cost-effective approach also contributes to sustainable farming practices by reducing operating expenses.
Remember: This guide provides general instructions. Always refer to your specific patch kit instructions and prioritize safety. When in doubt, consult a tire professional.